If you’re remodeling a house, especially an older home, one of the biggest lessons I’ve learned so far is this:
Framing is the skeleton of the entire remodel.
You can have beautiful design ideas, stunning finishes, and high-end materials planned, but if the framing isn’t right, everything that comes after it becomes harder.
Drywall. Doors. Trim. Cabinets. Even how a room feels when you walk into it.
This is the first chapter in my Morning remodel series, where I’m sharing what this home is teaching me along the way. And before drywall goes up, I want to talk about the stage that quietly controls almost everything that follows.
Framing.
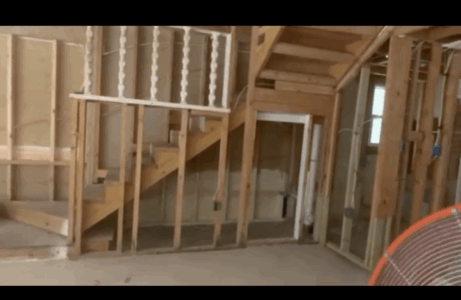
An overall look at the home during the open-framing stage. This is the phase where layout, flow, and structure are fully visible before the walls are closed up.
Framing Is More Than “Putting Wood Up”
Framing isn’t just building walls. Good framing is about structure, precision, and planning ahead.
When framing is done well, it makes the next phases smoother:
- drywall installation
• doors and windows
• trim and baseboards
• cabinetry and built-ins
• mounting TVs and heavy fixtures
When framing is rushed or off, those mistakes don’t disappear. They show up later.
And later is always more expensive.
Straight. Square. Plumb. The Small Things Become Big Things.
Here’s the truth most people don’t realize until they’re in it:
small framing mistakes turn into big remodeling problems.
In this house, opening up the walls revealed areas that weren’t straight, square, or aligned the way they needed to be. And those are exactly the things that must be addressed now, before drywall makes them harder and more expensive to fix.
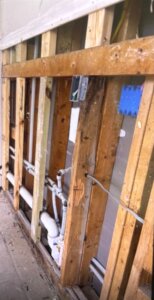
 This wall is a perfect example of what you uncover during a remodel. Exposed plumbing, electrical, and older framing showed areas that needed correction before moving forward.
A good framer pays attention to:
- straight walls
• square corners
• plumb framing
• clean openings
Because “close enough” becomes very obvious once drywall, doors, and trim go in.
A remodel can move fast. This is the part you don’t want to rush.
Measure Twice… Then Measure Again
One of the biggest takeaways from this remodel has been how powerful accurate measurements really are.
An inch off in framing can affect:
- door placement
• trim lines
• cabinet fit
• drywall seams
• even how a room feels
In a remodel, it’s almost always better to slow down and re-check measurements than to fix something that could have been prevented.
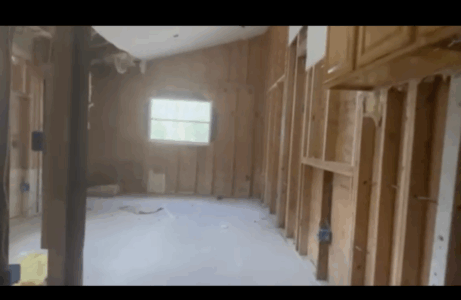 Long wall runs and open rooms like this are where precise measurements matter most. These are the spaces where small inconsistencies show up later in drywall, trim, and cabinetry.
Don’t Overlook Closets and “Smaller” Spaces
Closets and less-visible spaces are easy to overlook during framing because they don’t feel like the main focus.
But if openings are framed incorrectly, you feel it later when you’re trying to install:
- closet doors
• trim
• shelving
• clean drywall lines
Closets still need clean framing, because once finishing work begins, everything shows.
Plan Now for What the Walls Need to Hold
This is one of those lessons people usually learn the hard way.
Before drywall goes up, ask yourself:
- Where will the TV go?
• Will there be heavy shelving?
• Will you install a mini split system?
• Will you mount mirrors, cabinets, or storage?
If something heavy is going on a wall, you may need to double up framing or add blocking now, while the walls are still open.
Not after.
Think Bigger Than Looks: Lifestyle and Layout Matter
What if you want a hanging chair or a hanging bench in a bedroom?
That needs to be planned during framing, not after drywall is installed.
Your remodel should support how you actually want to live in the home, not just how you want it to photograph.
And if you don’t know every final detail yet, that’s okay.
Pro Tip: Photograph Your Framing Before Drywall
Before drywall installation begins, take pictures of the framing.
You will thank yourself later when you’re trying to remember:
- where studs are
• where blocking was added
• what’s behind the wall
• where support exists
This is one of the easiest remodel habits that can save you real time and frustration down the road.
Final Takeaway: Don’t Build on “We’ll Fix It Later”
Framing sets the foundation for everything that comes next.
And when it’s time for drywall, remember:
Mudding helps.
It can fix small imperfections and even some bigger ones.
But it is still extra work that has to be done right.
Don’t let “we’ll fix it later” be the plan.
And If It’s a 100-Year-Old Home…
Here’s the reality of older houses.
Sometimes there is only so much you can do.
That’s real life.
But the good news is this: shims can work wonders.
And in the next chapter of this series, I’ll be sharing more about that as we move into openings, alignment, and preparing for drywall.
It’s not always about forcing perfection.
It’s about understanding what you’re working with and knowing how to adjust.
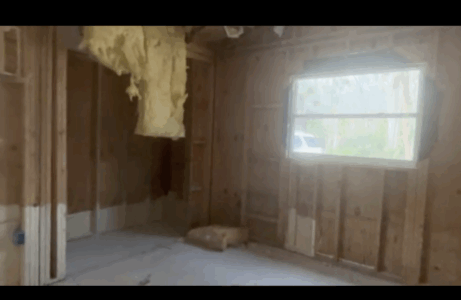
Older homes often reveal surprises once the walls are open. This stage is about recognizing what you’re working with and making smart adjustments before the next phase.
What’s Coming Next
What This Remodel Taught Me (Part 2): Openings, Measuring, and Planning for the “Skin” (Drywall)
We’ll be talking about doors, windows, closets, and why thinking ahead to drywall thickness and final finishes makes all the difference before moving forward.
This remodel is being documented in real time on the Ada Love Your Home blog and social platforms, where I’m sharing behind-the-scenes progress, lessons learned, and practical tips for homeowners thinking about renovating or rebuilding.
Part Two Can Be Found Here:
The Remodel Diaries (Part 2): Openings, Measuring, and Planning for the “Skin” (Drywall)